How To Install Lighting In Any Cabinet For Less Than $5

How To Install Lighting In Any Cabinet For <$5
Like under cabinet lighting but not the price? Today I’m going to share how you can install lighting in any cabinet for <$5.
A few months ago, I got the final shipment of furniture for my room and included in this shipment were the cabinets for my craft supplies. The cabinets are the Lixhult cabinets from IKEA (side-note: these were the most annoying things that I’ve ever assembled from IKEA)

Once I had them all assembled, I realized how dark they were inside and this made finding things in the cabinet difficult, especially at night (which is when I do a lot of my crafting).
Enter dollar store home improvement to the rescue.
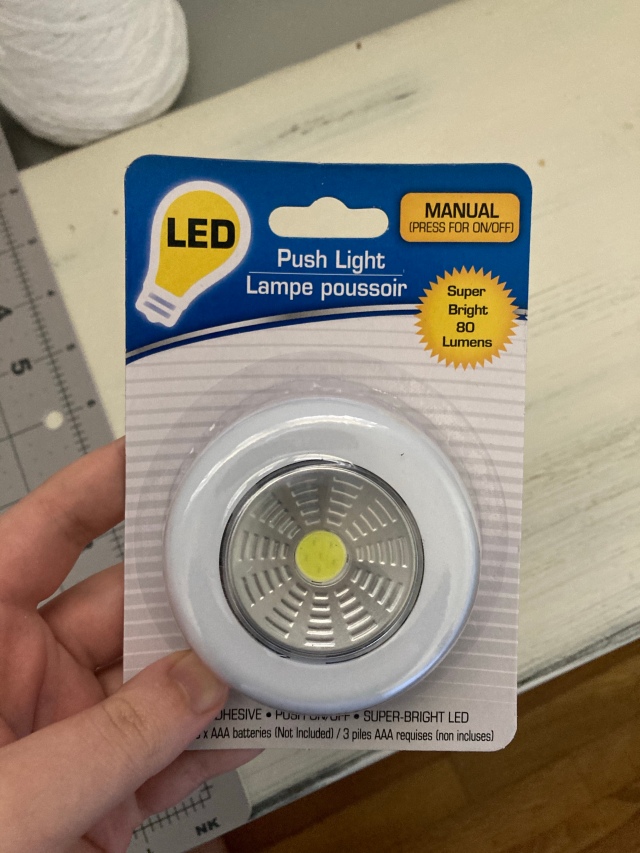
I don’t know about the rest of you, but the dollar store is not the first place I think of when it comes to home decor. Nevertheless, that is exactly where I found the solution to my lighting dilemma, in the form of LED push lights.
The particular lights I’m using are from Dollar Tree and are 2.75 inches in diameter and 80 lumens.
They’re not exclusive to Dollar Tree though and similar ones can be found on Amazon for about the same price. There are some stores that sell the same thing for upwards of $7 each.
These are nice because they require no tools or wiring, making these super easy + quick to install. The only thing that they require are 3 AAA batteries, which are not included.
How to install:
The first thing I did was unscrew the light and install the three AAA batteries. I then screwed it back together and checked to make sure it worked before deciding on where to attach it to my cabinet.
I recommend cleaning the surface with an all purpose cleaner before affixing the light, this removes dirt and grease and helps the adhesive stick on to the surface better. Be sure the area is dry before attaching the light.
To attach, peel the paper off of the adhesive backing and press the light onto the desired surface.
When the batteries die, just unscrew the top part, replace the batteries and reattach the top. I’ve had these in the cabinets for five months now and have yet to replace the batteries.
There you have it, simple and cheap lighting hack! I spent a grand total of $2 for both of my craft cabinets.
Be sure to pin this post for later and to follow me here and on Instagram @yarnbending for more tips like this and for previews of new projects and patterns.
This post first appeared on yarn-bending.com


