
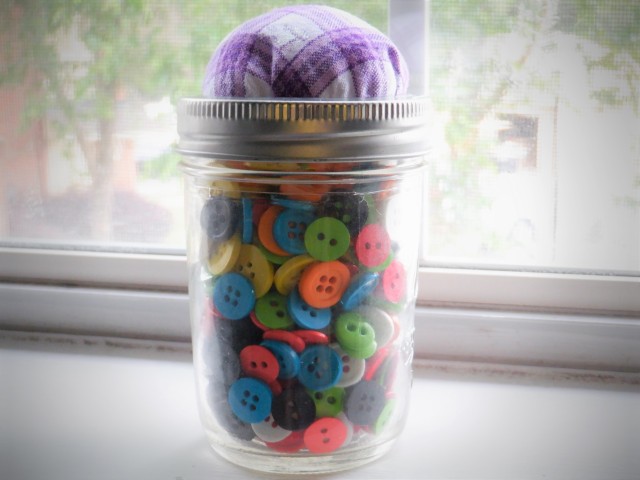
Mason Jar Pincushion
Today I wanted to share the super cute pincushion I made to sit on top of my button jar.
You could also put sewing notions in the jar to create an on-the-go sewing kit. It could also be a kids first sewing kit. You could even let your kids help with this, this a great first sewing project. It’s also a great way to use up scraps, since you only need a small amount of fabric, thread, and stuffing to make this.
The jar I’m using is regular-mouthed 8 oz Kerr mason jar, but this method will work for any jar with a standard 2 part canning lid consisting of the flat lid and screw band.
You will need:
- mason jar with standard canning lid
- a square of scrap fabric (mine was 6″x6″)
- sewing thread
- stuffing
- sewing needle
- scissors
- pinking shears
- pencil
- fabric or hot glue
Putting it Together
Start by ironing your fabric. On the wrong side of the fabric, place the screw band in the center and trace around the outside of the lid with a pencil. Remove the lid, and add an additional 1-1.5 inches to the circumference (a geometry compass is helpful for this).
Cut the circle out with pinking shears (to prevent fraying). Sew a basting stitch around the circle, about 1/2 inch away from the edge. After you’ve finished stitching around, pull the thread to gather. Distribute the gathers evenly around the circle.
You should now have a sort of bowl shape. Stuff this, and place though the center of the screw ring. Place the flat lid, but don’t let the edges of the fabric get caught under it.
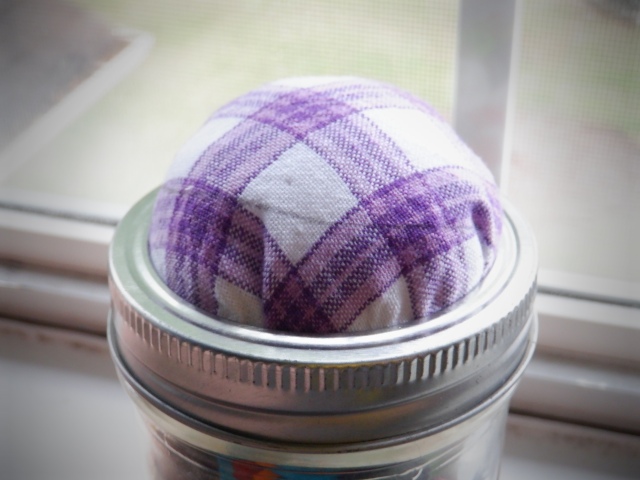
Pull the fabric edges around the flat lid and glue the edges in place with either fabric or hot glue.
Screw your lid back onto your mason jar as normal!
