
Beginning Crochet Tutorial (For Lefties)
We will start with the very basics of crochet- the slip knot, chain stitch and single crochet.
You will need:
- A ball of yarn, preferably acrylic (it slides better on the hook than cotton does)
- A size G/4.5 or size H/5.00 crochet hook

Slip knot: Leaving about a six inch tail, position your yarn like in the photo.

Insert hook under the bar on the right and pull the tail (the tail is the part not coming from the skein of yarn.)
Now let’s talk about your grip on the hook, there are two ways to do this,

The “knife grip”

Or the “pencil grip”
Try both and see which feels most comfortable to you. If you have arthritis or joint pain, the knife grip might be more comfortable . I will be using the pencil grip in the following pictures.
Chain Stitch Tutorial
Similar to casting on in knitting, the chain stitch sets your base. This is the most basic stitch and the most important one. Abbreviated ch or chain in most crochet patterns

1. Holding your hook in your chosen position and keeping the tail tucked in your ring and pinkie fingers, yarn over with your right hand,

2. And pull through the loop on the hook. You have know made one chain. Repeat steps 1&2 to get your desired number of chains, or the number of chains specified in your pattern, try about 15 for now.
One of the biggest problems for new crocheters is the tension of their stitches. It is important to maintain proper tension not too tight but not too loose. One way you know when it is too tight is when it’s a struggle to pull the hook through the stitches, it’s too loose when the stitches fall off the hook.

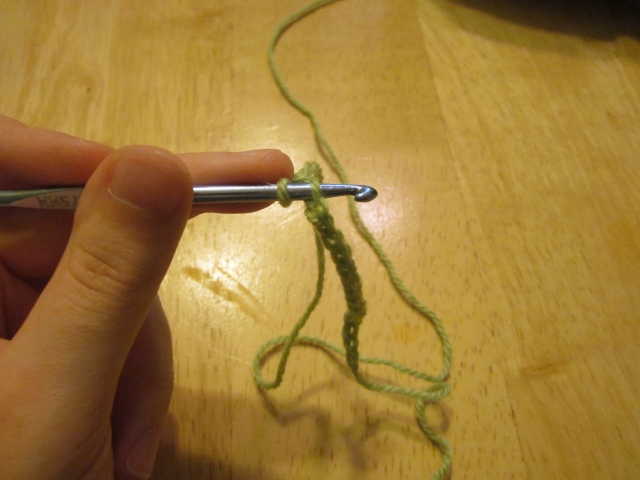
A good chain should look something like this.
Single Crochet Tutorial
Abbreviated sc in US patterns, dc in UK and European patterns
1. Insert your hook in the 2nd chain from the hook.

2. Yarn over with your right hand.
 3. Pull the yarn through the first loop on the hook.

4. Yarn over and pull through both loops on the hook.
Repeat steps 1-4 in every chain all the way to the end of the chain.

Here’s what it should look like after you finish one row.
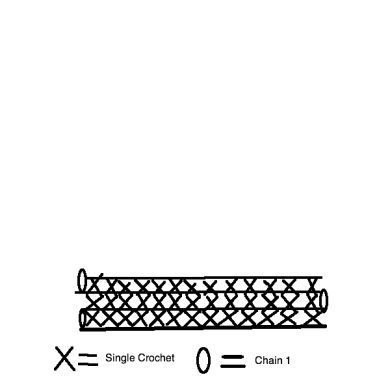
5. To do another row, chain 1 turn your work so that the last stitch you did, is now the first stitch of the new row. Chain 1, insert your hook in both loops of the stitch and repeat steps 2-4. Repeat steps 1-4 for the rest of the row.

If you have any questions or problems, let me know in the comments below.
If you are ready for the next stitch see my double crochet tutorial.